VPS එකකට myVesta (Vestacp Fork) Web Hosting Control Panel එක Install කර ගන්නේ කොහොමද ?
මේ Control Panel එකේ නම myVesta. මෙය Vestacp හි Fork එකක් වේ. නිළ Vestacp මෑතකදී යාත්කාලීන කරනු නොලැබීම නිසා එය භාවිතා කිරීම ආරක්ෂිත නොවේ. Vestacp පරිශීලනයට හුරු අයෙකුට වෙනත් Panel එකකට මාරුවීම අමාරු විය හැකි නමුත් Vestacp මෙන් Free සේවාවන් ලබා දෙන Control Panel එකක් සොයා ගැනීම අපහසුය. මේ ගැටළුවට විසඳුමක් ලෙස myVesta භාවිතා කළ හැක.
myVesta නිළ Vestacp හි සාමාන්ය ආරක්ෂාවට වඩා වැඩි ආරක්ෂාවක් ලබා දෙන බව Developers පවසයි. නිළ Vestacp Ubuntu, Debian සහ CentOS සඳහා සහාය දැක්වුවත්, myVesta Debian සඳහා පමණක් සහය දක්වයි.
Features
- Support for Debian 12 (Debian 12 is recommended, but previous Debian releases are also supported)
- Support for MySQL 8
- nginx templates that can prevent denial-of-service on your server
- Support for multi-PHP versions
- You can host NodeJS apps
- You can limit the maximum number of sent emails (per hour) per mail account and per hosting account, preventing hijacking of email accounts and preventing PHP malware scripts to send spam.
- You can see what PHP scripts are sending emails, when and to whom
- You can completely “lock” myVesta so it can be accessed only via secret URL, for example https://serverhost:8083/?MY-SECRET-URL
- During installation you will be asked to choose a secret URL for your hosting panel
- Literally no PHP scripts will be alive on your hosting panel (won’t be able to get executed), unless you access the hosting panel with secret URL parameter. Thus, when it happens that, let’s say, some zero-day exploit pops up – attackers won’t be able to access it without knowing your secret URL – PHP scripts from VestaCP will be simply dead – no one will be able to interact with your panel unless they have the secret URL.
- You can see for yourself how this mechanism was built by looking at:
- If you didn’t set the secret URL during installation, you can do it anytime. Just execute in shell:
echo "<?php \$login_url='MY-SECRET-URL';" > /usr/local/vesta/web/inc/login_url.php
- We disabled dangerous PHP functions in php.ini, so even if, for example, your customer’s CMS gets compromised, hacker will not be able to execute shell scripts from within PHP.
- Apache is fully switched to mpm_event mode, while PHP is running in PHP-FPM mode, which is the most stable PHP-stack solution
- OPCache is turned on by default
- Auto-generating LetsEncrypt SSL for server hostname (signed SSL for Vesta 8083 port, for dovecot (IMAP & POP3) and for Exim (SMTP))
- You can change Vesta port during installation or later using one command line: v-change-vesta-port [number]
- ClamAV is configured to block zip/rar/7z archives that contains executable files (just like GMail)
- Backup will run with lowest priority (to avoid load on server), and can be configured to run only by night (and to stop on the morning and continue next night)
- You can compile Vesta binaries by yourself – src/deb/vesta_compile.sh
- You can even create your own APT repository in a minute
- We are using latest nginx version for vesta-nginx package
- With your own APT infrastructure you can take security of Vesta-installer infrastructure in your own hands. You will have full control of your Vesta code (this way you can rest assured that there’s 0% chance that you’ll install malicious packages from repositories that may get hacked)
- Binaries that you compile are 100% compatible with official VestaCP from vestacp.com, so you can run official VestaCP code with your own binaries (in case you don’t want the source code from this fork)
Hosting Notice – ඔබගේ Windows/Linux VPS, Shared Hosting, E-mail Hosting අවශ්යතා සඳහා විශ්වාසවන්ත සහ හොඳම විසඳුම් Divvy Hosting (Pvt) Ltd වෙතින් ලබා ගන්න. වැඩි විස්තර සඳහා 071 6 682 682 අංකයට කතා කරන්න හෝ WhatsApp කරන්න. වෙබ් අඩවියට පිවිසෙන්න: www.divvyhosting.net
myVesta VPS එකකට Install කිරීමේ ක්රියාවලිය
1. Debian 12 Install කිරීම
මුලින්ම ඔබේ VPS එකට Debian 12 Install කරගන්න. (Debian 12 නිර්දේශිතය, නමුත් පෙර නිවේදන සඳහාද සහය දක්වයි).
2. SSH හරහා සම්බන්ධ වන්න
VPS එකට root user ලෙස SSH මගින් සම්බන්ධ වන්න.
3. System Update කිරීම
Server එක අලුත්ම updates එකකින් යාවත්කාලීන කරන්න:
sudo apt-get update
4. curl Install කිරීම
curl Install කිරීම සඳහා පහත Command එක ක්රියාත්මක කරන්න:
sudo apt-get install curl -y
5. Installation Script එක බාගත කිරීම
පහත Command එක භාවිතා කර Script එක බාගන්න:
curl -O http://c.myvestacp.com/vst-install-debian.sh
6. Script එක ධාවනය කිරීම
Script එක ධාවනය සඳහා පහත Command එක භාවිතා කරන්න:
bash vst-install-debian.sh
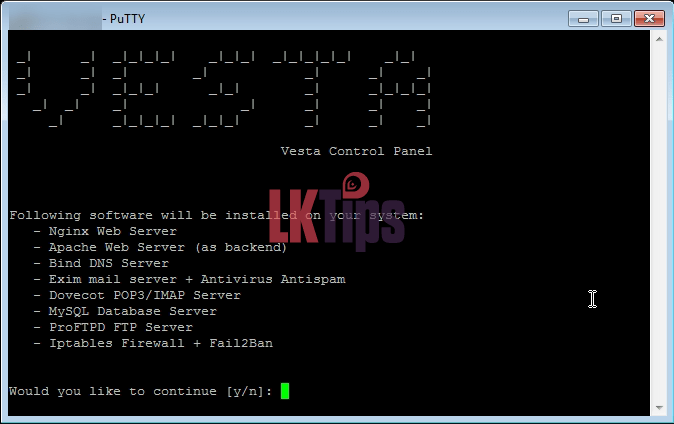
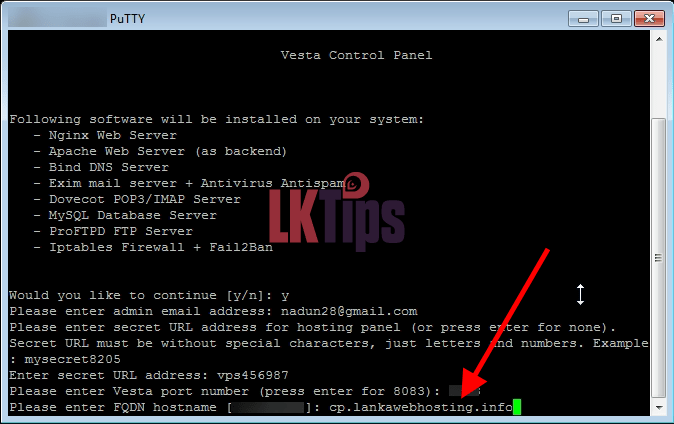
Y ඔබන්න: Installation ආරම්භ කිරීම සඳහා.
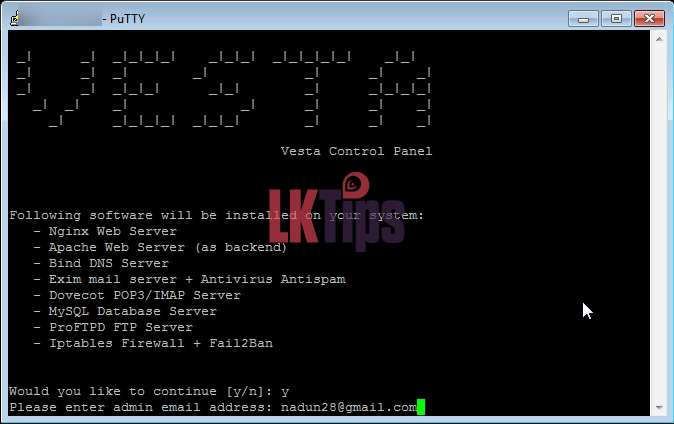
Email Address එක Type කරන්න: ඔබේ Email එක ඇතුලත් කර Enter කරන්න.
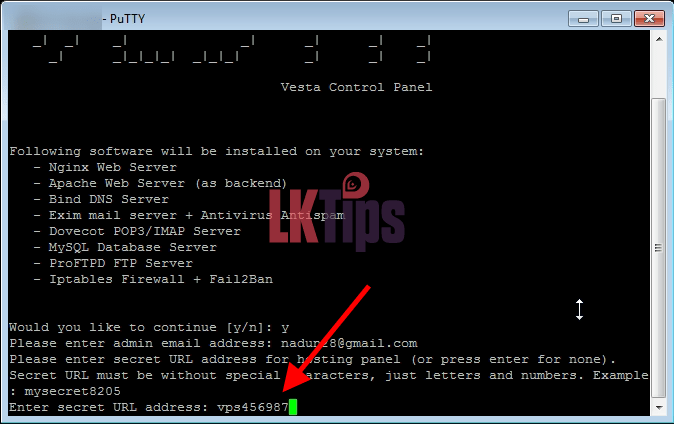
Secret URL එකක් දෙන්න: Secret URL එකක් ඔබේ Panel එකට ආරක්ෂාවක් ලෙස දෙන්න (උදා: vps456789).
සටහන:
Secret URL එකක් නිවැරදිව දෙන්නේ නම්, Panel එකට ලොග් වීම සඳහා ඒ URL එක භාවිතා කළ යුතුය. උදාහරණය: https://cp.yourdomain.com:8083/?vps456789
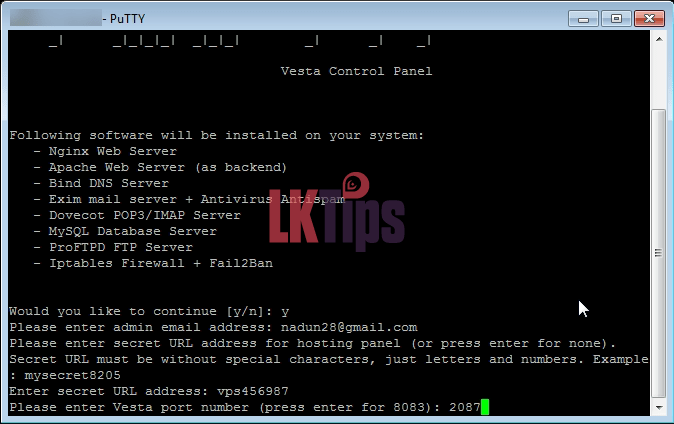
8. Port Number එක වෙනස් කිරීම
කැමති Port Number එකක් ලබා දී Enter කරන්න. (Default Port එක :8083 ලෙස වෙනස් කිරීමෙන් ආරක්ෂාව වැඩි වේ).
9. Hostname එකක් ලබා දීම
- Sub Domain එකක් නිවැරදිව දෙන්න (උදා:
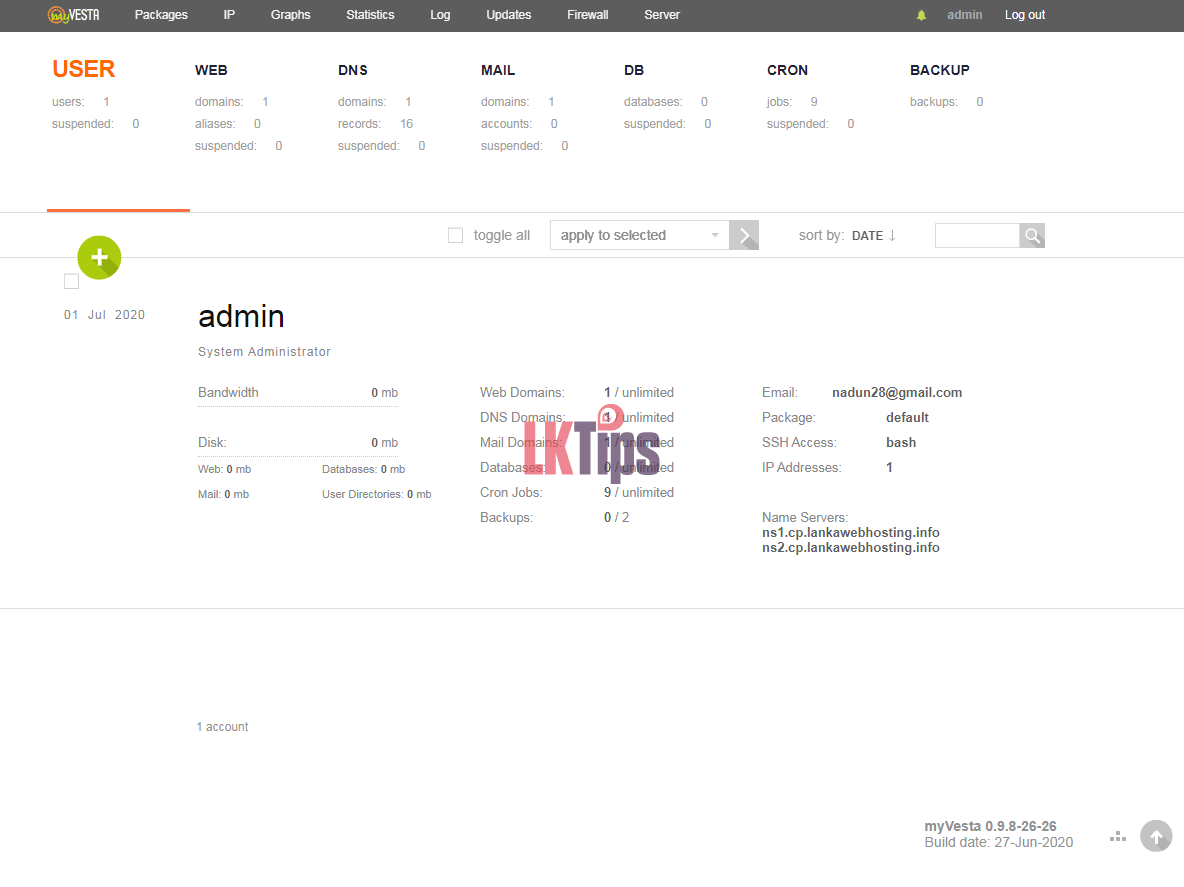
cp.yourdomain.com). - Sub Domain එකේ A Record එකක් VPS IP එකට සම්බන්ධ කර ගන්න.
- SSL Certificate එක Active වීමට A Record එකක් අනිවාර්ය වේ.
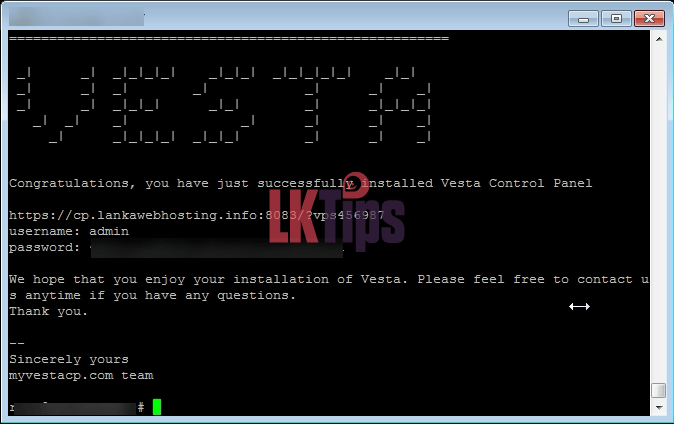
10. Install එක සම්පූර්ණ කිරීම
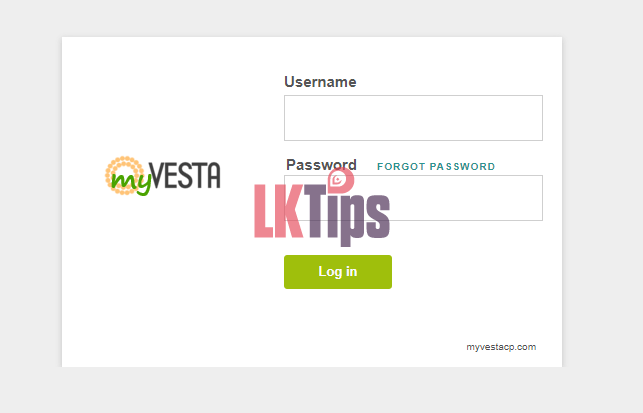
Install කිරීම අවසාන වීමේදී Username/Password ලබා දෙනු ඇත. ඒවා Panel එකට ලොග් වීමට භාවිතා කරන්න.
වැඩිදුර තොරතුරු සඳහා:
- myVesta වෙබ් අඩවිය: https://myvestacp.com/
- Support Forum: https://forum.myvestacp.com/
- GitHub: https://github.com/myvesta/vesta
ගැටළුවක් නම්:
Comment මාර්ගයෙන් අහන්න, මම උපකාර කරන්නම්.
ස්තුතියි!
mam meka install kara mage vps ekata
mail server ekei phpmyadmin ekei aulak thiynwa
http://www.mydomain.com/phpmyadmin
http://www.mydomain.com/webmail
phpmyadmin ekata yadi mokawth pene na sudu pata page ekak vithrai thiyne
webmail ekata yadi mehema enwa
CONFIGURATION ERROR
config.inc.php was not found.
Please read the INSTALL instructions!
hadaganna vidhak kiyanako
Panel eka install karanakota dunna hostname eka tiynne (sub domain eka) anna ekn yanna webmail walatai phpmyadmin walatai anivaryen wada karanawa ethakota ehama une nathm mata kiyanna man help ekk denam , thawa new panel ekk gana post ekk anidda danawa man ekath balanna thank you .!
ah hari mam balanam thank you 😀
mail server eken mail ekak danna yadi mehema enawane
SMTP Error (550): Failed to set sender “support@mysite.com” (Access denied – Invalid HELO name (See RFC2821 4.1.3)).