Cent OS 6 හෝ 7 VPS එකකට CentOS Web Panel එක Install කර ගන්නා ආකාරය.

අද මම කියලා දෙන්නේ CentOS Web Panel එක Install කරගන්න ආකාරය පිලිබදවයි.
System Requirements:
32bit Server – 512MB RAM
64bit Server – 1024MB RAM
HDD – 10 GB
Operating System:
CentOS 6.x, 7.x
RedHat 6.x, 7.x
CloudLinux 6.x, 7.x
Features :
– Apache Web Server (Mod Security + OWASP rules optional)
– PHP 5.4 (suPHP, SuExec + PHP version switcher)
– MySQL + phpMyAdmin
– Postfix + Dovecot + roundcube webmail (Antivirus, Spamassassin optional)
– CSF Firewall
– File System Lock (no more website hacking, all your files are locked from changes)
– Backups (optional)
– AutoFixer for server configuration
3rd Party Aplications
– CloudLinux + CageFS + PHP Selector
– Softaculous – Script Installer (Free and Premium)
CentOS Web Panel (CWP)
– Setups Server for Web Hosting (websites like WordPress…)
Web Server
– Varnish Cache server (improve your server performances by 3x)
– Compiles Apache from source (improves up to 15% on performances)
– Apache reCompiler + Additional modules install with one click
– Apache server status, configuration
– Apache Redirects Manager
– Edit apache vhosts, vhosts templates, include configuration
– Rebuild all apache Virtual hosts with one click
– suPHP & suExec (improved security)
– Mod Security + OWASP rules (one click install, easy management)
– Tomcat 8 server management & install in one click
– DoS protection from the Slow-Loris attacks
– Perl cgi script support
PHP
– Compiles PHP from source (improves up to 20% on performances)
– PHP Switcher (switch between PHP versions like: 5.2, 5.3, 5.4, 5.5)
– PHP Selector select PHP version per user or per folder (PHP 4.4, 5.2, 5.3, 5.4, 5.5, 5.6)
– Simple php editor
– Simple php.ini generator in the users panel
– PHP addons with one click
– PHP.ini editor & PHP info & List modules
– php.ini per user account (you can add changes in /home/USER/php.ini)
– FFMPEG, For Video streaming websites)
– CloudLinux + PHP Selector
User Management
– Add, List, Edit adn Remove Users
– User Monitoring (list users open files, listening sockets…)
– Shell access management
– User Limit Managment (Quota and Inodes)
– Limit Processes: The maximum number of processes available per account.
– Limit Open Files: The maximum number of open files available per account.
– User FTP & File Manager
– CloudLinux + CageFS
– Dedicated IP per account
DNS
– FreeDNS (Free DNS Server, no need for additional IPs)
– Add, Edit, List and Remove DNS zones
– Edit nameserver IPs
– DNS zone template editor
– New Easy DNS Zone Manager (with ajax)
– New DNS Zone list with Additional resolving information using google (also checking rDNS, nameservers….)
Email
– postfix & dovecot
– MailBoxes, Alias
– Roundcube webmail
– Postfix Mail queue
– rDNS Checker Module (check you rDNS records)
– AntiSPAM (Spamhaus cronjob)
– SPF & DKIM Integration
– Re-Build Postfix/Dovecot Mail server with (AntiVirus, AntiSpam Protection)
– Email Auto Responder
System
– Hardware Information (CPU core and clock info)
– Memory Information (Memory usage info)
– Disk Info (Detailed Disk status)
– Software Info (kernel version, uptime…)
– Services Status (Quick services restart eg. Apache, FTP,Mail…)
– ChkConfig Manager (Quick list and manage your services)
– Network port usage
– Network configuration
– SSHD configuration
– Auto-Fixer (checks important configuration and tries to auto-fix issues)
Monitoring
– Live Monitoring (Monitor services eg. top, apache stats, mysql…)
– Use Java SSH Terminal/Console within panel
– Services Configuration (eg. Apache, PHP, MySQL…)
– Run shell commands in screen/background
Security
– CSF Firewall (Best Linux Firewall)
– SSL generator
– SSL Certificate Manager (quick and easy installation of SSL Certs)
– CloudLinux + CageFS
SQL
– MySQL Database Managment
– Add local or remote access user
– Live Monitor MySQL process list
– Create, Remove database
– Add additional users per database
– MySQL server configuration
– PhpMyAdmin (database managment)
– PostgreSQL
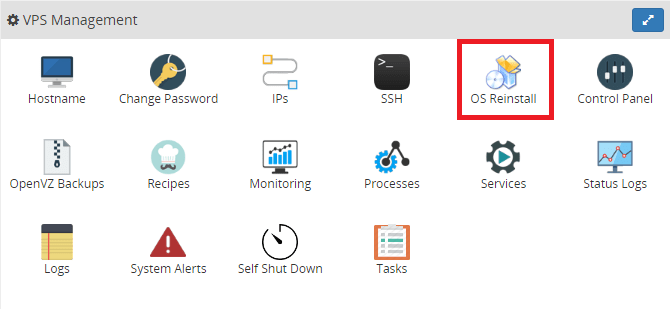
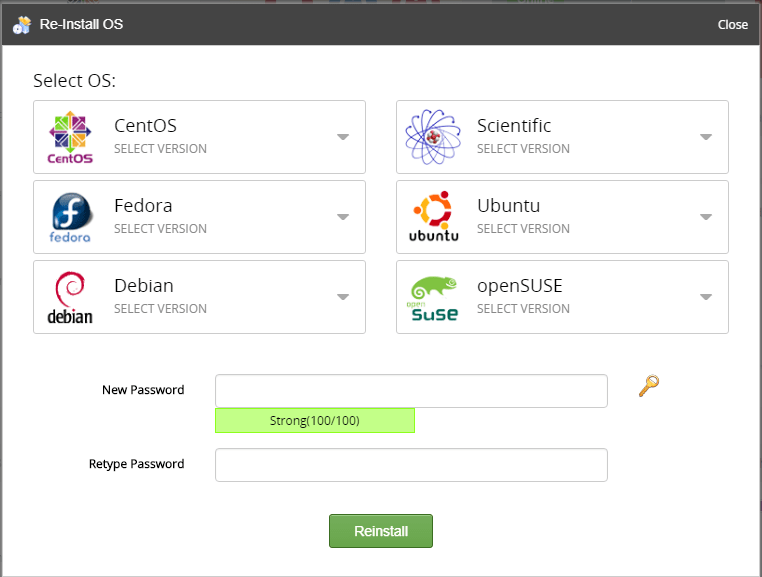
මුලින් ම VPS එකට Cent OS 6,7 Install කරගන්න.
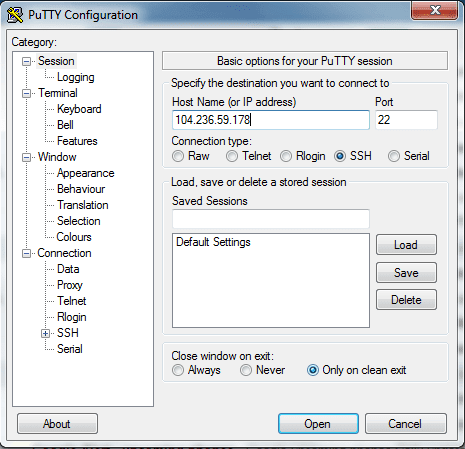
ඊළගට Putty Download කරගන්න.
32bit https://the.earth.li/~sgtatham/putty/latest/w32/putty.exe
64bit https://the.earth.li/~sgtatham/putty/latest/w64/putty.exe
Putty Host Name එකට VPS එකේ IP එක දීලා Open ඔබන්න.
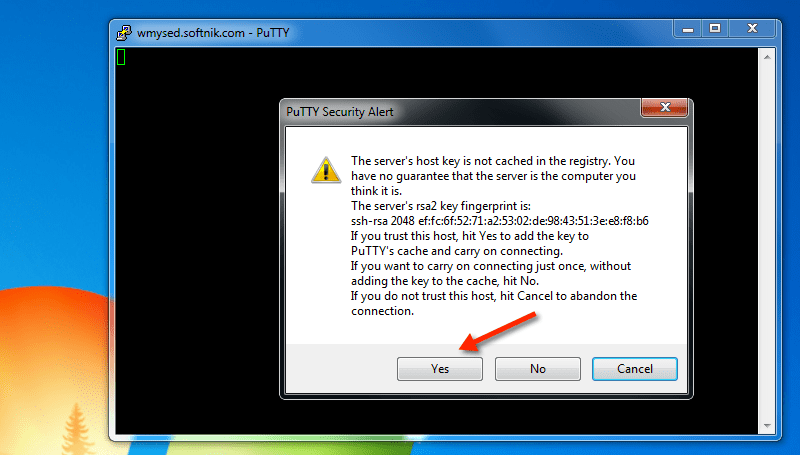
ඔය Security Alert එකට Yes ඔබන්න.
ඊළගට එනවා Windows වල CMD එක වගේ එකක් එකේ login as: කියන එක ඉදරියෙන් root කියලා Type කරලා Keyboard එකේ Enter ඔබන්න.
ඊළගට root Password එක Type කරන්න. එකේ Type වෙනවා පෙන්නේ නැහැ එත් එතන වදිනවා. (Paste කරනවනම් එතන ක්ලික් කරලා Mouse එකේ Right ක්ලික් කර ගමන් Paste වෙනවා.) ඊට පස්සේ Enter ඔබන්න.
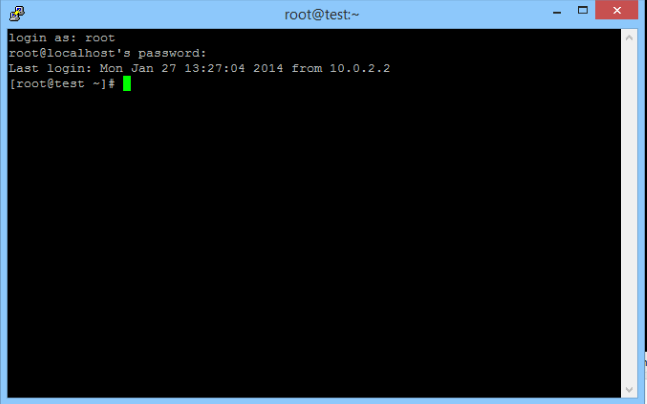
VPS එකට SSH වලින් ලොග් උනාම මෙන්න මේ වගේ
පහත Command පිලිවලෙන් Copy / Paste කරන්න දැන්. (Copy කරලා Putty එක උඩ ක්ලික් කරලා Mouse එකේ Right ක්ලික් කලා නම් ඇති නිකන් ම Paste වෙනවා)
1. Update the CentOS 7 operatig system
yum -y update
2. Install wget tool to download the installation file
yum install wget -y
3. Reboot Server
reboot
CentOS 6: New Installer with MARIA-DB 10-latest (Cent OS 6 නම් Install කරේ VPS එකට පහත Command භාවිතා කරන්න)
cd /usr/local/src
wget http://centos-webpanel.com/cwp-latest
sh cwp-latest
ඉහත Download Link එක වැඩ කරන්නේ නැතිනම් මේ Link එක භාවිතා කරන්න. CentOS 6 සදහා – http://dl1.centos-webpanel.com/files/cwp2-latest
CentOS 7: Installer for CentOS 7 (Cent OS 7 නම් Install කරේ VPS එකට පහත Command භාවිතා කරන්න)
cd /usr/local/src
wget http://centos-webpanel.com/cwp-el7-latest
sh cwp-el7-latest
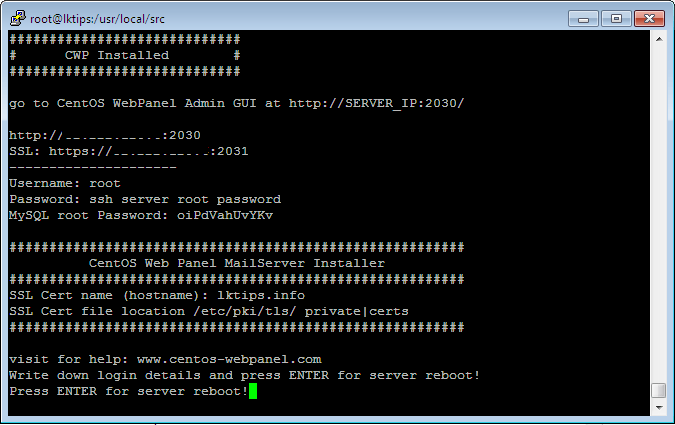
සියල්ල Install වීමෙන් පසු Panel එකේ Username Password සියල්ල පහත රුපයේ ආකාරයට දිස් වෙයි. ඒ ටික සිලෙක්ට් කළා නම් නිකන් ම Copy වෙනවා ඒක කොහේ හරි Save කරලා තියාගන්න. ඊට පස්සේ කී බෝඩ් එකේ Enter Key එක ඔබන්න VPS එක Reboot කරන්න.
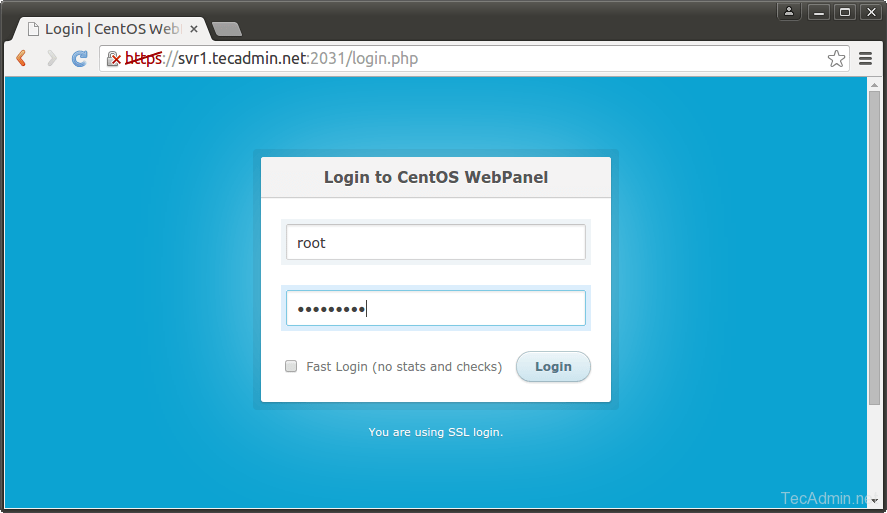
Panel එකට ලොග් වෙන්න VPS එකේ IP එක අන්තිමට :2030 එකතු කරලා ඒ ලිපිනයට යන්න. (උදා – http://SERVER_IP:2030/ )
SSL වලින් යනවනම් VPS එකේ IP එකේ අන්තිමට :2031 එකතු කරලා ඒ ලිපිනය යන්න. ( උදා – https://SERVER_IP:2031/ )
Panel එකට ලොග් වෙන්න Username එක root ලෙස Type කරන්න
Panel එකට ලොග් වෙන Password එකට VPS එකේ root Password Type කරලා ඇතුළු වෙන්න.
මෙන්න තියෙනවා Panel එකට ලොග් වෙන තැන
ඔය තියෙන්නේ Panel එක (Screenshot එක පොඩි නම් එකේ උඩ ඔබන්න එතකොට ලොකුවට බලන්න පුළුවන්)
CentOS Web Panel එක Install කරන Commands ටික ගත්තේ CentOS Web Panel වෙබ් අඩවියෙන්. http://centos-webpanel.com/cwp-installation
ඔබට Cent Os Web Panel Install කරන්න ගිහින් මොනවා ගැටළුවක් අවොත් Comment එකක් මාර්ගයෙන් අහන්න මම උදව් කරන්නම්
Cent OS වෙබ් පැනලය ස්ථාපනය කිරීමට ඔබට VPS එකක් අවශ්ය නම් ඔබට එය Lanka Web Hosting වෙතින් ලබා ගත හැක.
ස්තුතිය.